
Did you know that 22% of returns are due to products looking different in person compared to listing photos? That’s just one example of how crucial product images are for ecommerce sales. However, achieving attractive and accurate product photography can be a challenge, even for seasoned professionals.
Contrary to popular belief, you don't need a massive budget and a team of photographers to take enticing images for your website. Whether you're aiming for product or lifestyle images (or a combination of both) for ads, product pages, or promotional emails, you can easily create amazing visuals with just your iPhone. All it takes is a bit of planning, creativity, and the expert tips provided in this article.
Understanding the Difference Between Product and Lifestyle Images
Product and lifestyle images are the two main types of product photography commonly found on product pages and across marketing platforms. Product images are typically "clean" with white backgrounds, allowing for a consistent visual experience when browsing through your product line.
On the other hand, lifestyle images showcase your product in action, whether it's in its natural environment or alongside complementary products. These shots provide creative freedom and help shoppers envision themselves using your product.
 We recommend a mix of product and lifestyle images for every product page.
The Ultimate Equipment Checklist
The good news is that you don't need expensive equipment to achieve great product photography. With a few essential items, you can DIY your way to stunning images. Here's what you'll need:
✅ A camera (a smartphone can work just fine if you don't have a DSLR)\ ✅ A tripod\ ✅ A white background (poster board or a white sheet will do)\ ✅ White foam board bounce cards to reflect light into the shadows\ ✅ A table\ ✅ Tape to secure your bounce cards\ ✅ A well-lit room with natural light
Steps for Shooting Product Images
To ensure you cover all your bases, start by creating a shot list that includes all the products you need to photograph and any special details or requirements associated with each.
Set up your shooting area close to a window for soft, natural light. Remember to turn off any other lights in the room. Place your product in the middle of your shooting area, ensuring a seamless transition between the vertical and horizontal planes.
Set up your camera on a tripod and adjust the settings accordingly, such as white balance, flash, image quality, aperture, and ISO. Use a reflector card (foam board) to experiment with different angles and fill in shadows.
Once you've taken the pictures, upload them to your computer for review. This allows for more accurate evaluation than viewing them directly on the camera.
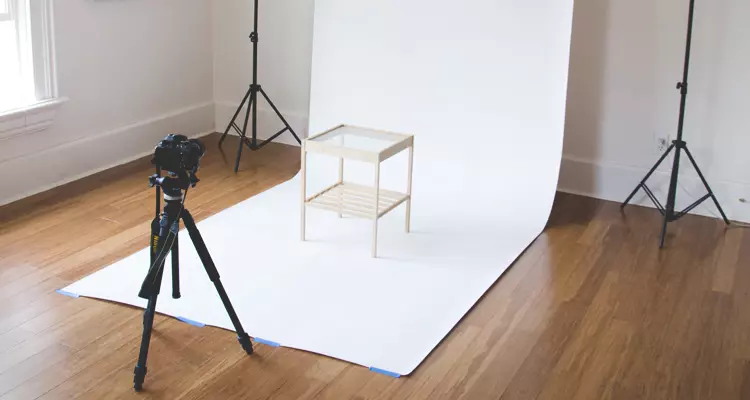
An example of a basic DIY product photography setup. Source
Pro tips:
- Never shoot in direct sunlight to avoid harsh shadows.
- Capture multiple angles and close-up shots to highlight unique features.
- Avoid moving the camera and tripod during the shoot; instead, rotate the product as needed.
- Use a stool or pile of books if you don't have a tripod.
- Avoid using a wide-angle lens, as it may distort your product.
Steps for Shooting Lifestyle Images
Before shooting lifestyle images, determine the best context for each product. Consider your target audience, how the product will be used, where it will be used, and any additional items that should accompany it.
Do a location scout to find a suitable background that aligns with your product. Gather props that complement the style, theme, color, and texture of your product.
On the day of the shoot, let your creativity shine when staging your scenes. Lifestyle shots should be aspirational and inviting, drawing shoppers in. Remember to limit the number of items in the frame to keep the focus on your main product, and ensure your product is prominently placed and captures attention.
 A beautiful lifestyle photo from Payton Jewelry.
Pro tips:
- Shoot early in the morning or late in the afternoon for the best natural light.
- Use tape, blue tack, or glue dots to secure small items in place.
- Experiment with different layouts, such as mannequins, flat lays, or hangers for apparel.
Image Retouching Tips
No matter how skilled you are as a photographer, image retouching is essential to make your images website-ready. Thankfully, product photography editing software like Canva has made editing much easier over the years. Here are some pro tips to keep in mind when retouching:
- Check that your horizon is straight.
- Crop any excess space as necessary.
- Adjust the vibrancy, saturation, contrast, and exposure to make the colors pop while still looking realistic.
- Create a technical guide or template in your software for a consistent look across your edited product images.
Having amazing lifestyle and product photography enhances the perceived value and quality of your products while building your brand identity. By following these tips, you'll be able to produce fantastic product photography in no time.
Looking for more ways to deliver an amazing ecommerce experience? Check out the AdRoll app for Shopify today!
Last updated on September 16th, 2022.


